Have you ever looked at your trusty Arduino Uno while it’s struggling to blink an LED and read a single button at the same time, and thought, “I need more power?” We’ve all been there. You write a couple of delay loops, sprinkle in some nested if-statements, and suddenly your 8-bit, 16MHz microcontroller is wheezing like it just ran a marathon in wet jeans. You’re out of memory, you’re out of pins, and worst of all… you’re out of patience.
Enter the Raspberry Pi Pico. The first time I picked one of these up, I stared at it suspiciously. “Where are the female headers?” I muttered, fumbling for my soldering iron. “Is this a Linux computer, or a microcontroller?”
Well, my fellow purveyors of magic blue smoke, it’s a microcontroller—but not as you know it. It runs the custom RP2040 chip, it’s 32-bit, it has a dual-core processor, and it’s fast enough to make your old ATmega328P weep in the corner. Let’s dig into why you might want to switch camps (or at least expand your toolkit) and how to get started with the Pi Pico.
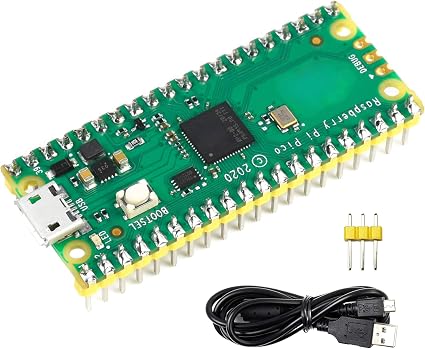
What is the Raspberry Pi Pico?
Unlike the traditional Raspberry Pi (which is a full-blown single-board computer running an OS), the Raspberry Pi Pico is a microcontroller board, much like an Arduino. The star of the show is the RP2040 silicon chip, designed in-house by Raspberry Pi.
Key Specs That Actually Matter
- Dual-Core ARM Cortex-M0+ Processor @ 133MHz: While your Arduino Uno operates at a leisurely 16MHz, the Pico is ripping through instructions at 133MHz… on two cores simultaneously. This means you can run one task (like updating an OLED display) on Core 0, while polling sensors on Core 1 without skipping a beat.
- 264KB of SRAM & 2MB of Flash Memory: Say goodbye to panicking over your variables eating up your precious 2KB of SRAM. You have room to breathe, log data, and write terrible, unoptimized code.
- 26 Multi-function GPIO Pins: You get PWM on every single pin. I repeat. PWM ON EVERY PIN. Never again will you have to hunt for a pin with a
~symbol next to it just to fade an LED. - Programmable I/O (PIO): This is the Pico’s secret weapon. PIO allows you to create custom hardware interfaces that run independently of the main processor.
- 3.3V Logic: Like the ESP32, the Pico uses 3.3V logic. Do not feed it 5V sensors directly, unless you enjoy the smell of burnt silicon.
Pico vs. Pico W vs. Pico H
When you go shopping, you’ll notice a few variations of this board. Here’s what you need to know:
- Raspberry Pi Pico: The original flavor. No wireless, no headers. You will need to solder the pins yourself.
- Raspberry Pi Pico H: The “H” stands for Headers. These come pre-soldered. If you don’t feel like breathing in rosin flux today, grab this one. 👉 Get it here: Raspberry Pi Pico H (with Headers) on Amazon
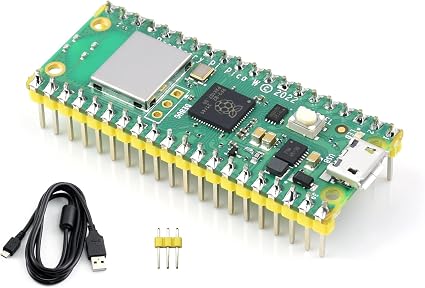
- Raspberry Pi Pico W: The “W” stands for Wireless. This version adds an Infineon CYW43439 chip, giving you Wi-Fi and Bluetooth BLE. If you’re building IoT projects like a Weather Station, you want the W. 👉 Get it here: Raspberry Pi Pico W (Wireless) on Amazon
How Do You Program It?
The beauty of the RP2040 is its flexibility. You have three main paths:
1. The Arduino IDE (C++)
Yes, you can absolutely use the familiar Arduino IDE. If you have an existing library of variables and loops that you want to port over, you can add the RP2040 board manager URL to your IDE preferences and code away just like you would on a Nano or Mega.
2. MicroPython (The Fan Favorite)
This is where the Pico really shines. Because it has so much memory and processing power, you can write Python code directly on the board. No compiling required—you just save your .py script, and it runs immediately. It is fantastically fast for prototyping.
3. C/C++ SDK
For the hardcore developers who want to squeeze every drop of performance out of the dual cores and PIO state machines, Raspberry Pi provides a comprehensive C/C++ SDK. It has a steeper learning curve but offers total control.
Your First Circuit: Powering Up
Unlike most Arduinos, the Pico uses a Micro-USB connector (a slight bummer in the age of USB-C, but we survive).
To put the board into programming mode for the very first time:
- Hold down the white BOOTSEL button on the Pico.
- Plug the USB cable into your computer.
- Release the button.
The Pico will show up on your computer as a USB mass storage device (like a flash drive). You literally drag and drop the firmware file (UF2) onto it, and it reboots. It’s that easy.
Summary
The Raspberry Pi Pico is an absolute beast for its price point. It bridges the gap between basic microcontrollers and full-blown computers, offering dual-core speeds, massive memory, and native Python support. While it won’t entirely replace the good old 5V Arduino for simple logic tasks, it should absolutely be in your breadboarding toolkit for anything that requires heavy lifting.
In the next lesson, we’ll dive into MicroPython vs. C++ and write our very first Pico script!