Welcome to Project 41! Let’s be honest for a second: there is nothing quite as humbling—or infuriating—as trying to elegantly land a Boeing 747 in Microsoft Flight Simulator while frantically dragging your mouse around to click a virtual toggle switch. By the time you find the landing gear button, you’ve already plowed into a virtual Wendy’s.
You could go online and drop $300 on a commercial flight sim control panel, but where’s the fun in that? We are makers. We like the smell of rosin core solder in the morning. We want tactile, satisfyingly loud clack noises and switches with those red missile covers that make us feel like we’re arming an ejection seat in a fighter jet.
Today, we’re building a custom USB HID Flight Simulator Switch Panel using an Arduino Leonardo. We’re going to trick your computer into thinking your homemade box of spaghetti wiring is a standard keyboard or joystick.
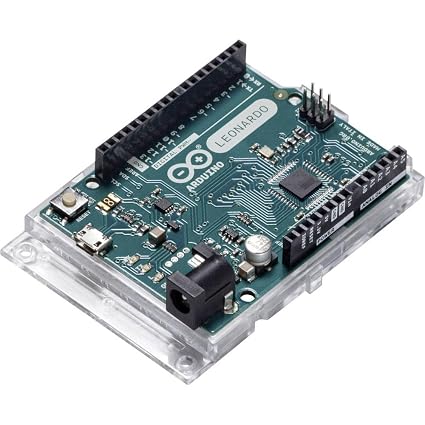
Why the Arduino Leonardo? (The Magic Chip)
If you read Lesson 111: Meet the Arduino Uno, you might be wondering why we aren’t using our trusty Uno for this. The secret lies in the microcontroller chip. The Uno uses the ATmega328P, but the Arduino Leonardo uses the ATmega32U4.
This magical little chip has built-in USB communication. That means it can natively emulate a USB Human Interface Device (HID)—like a mouse, keyboard, or gamepad.
The Parts List
To build your cockpit, you’ll need:
- Arduino Leonardo Board - The brains of our operation (make sure it’s a Leonardo or Micro, not an Uno!).
- SPST Toggle Switches with Missile Covers - Because deploying the landing gear should feel like a serious life decision.
- Arcade Buttons - Perfect for triggers, brakes, or changing camera views.
- A project box (a tupperware container or cardboard box works fine for prototypes).
Wiring It Up
The wiring is going to utilize the magic of internal pull-up resistors, exactly like we learned back in Lesson 114: Digital Inputs. We don’t need any external resistors!
- Connect one side of every switch and button to a common GND rail.
- Connect the other side of each switch/button to a digital pin on the Leonardo (e.g., Pins 2, 3, 4, 5).
When you flip a switch, it connects the digital pin to Ground, pulling the voltage LOW.
The Code: Sending Keystrokes
We will use the built-in Keyboard.h library. When a switch is flipped, the Arduino will “press” a key on your computer, just like a real keyboard.
Here is the code to get you started with mapping a toggle switch to the “G” key (which toggles landing gear in most flight sims).
#include <Keyboard.h>

const int gearSwitchPin = 2; // The pin for our landing gear switch
int previousGearState = HIGH;

void setup() {
  // Use the internal pull-up resistor
  pinMode(gearSwitchPin, INPUT_PULLUP);

  // Initialize control over the keyboard
  Keyboard.begin();
}

void loop() {
  // Read the current state of the switch
  int currentGearState = digitalRead(gearSwitchPin);

  // Check if the switch state has changed (been flipped)
  if (currentGearState != previousGearState) {

    // Send the 'G' keypress to toggle landing gear
    Keyboard.press('g');
    delay(100); // Hold the key for a fraction of a second
    Keyboard.release('g');

    // Add a debounce delay to avoid sending double-clicks
    delay(50);
  }

  // Save the state for the next loop
  previousGearState = currentGearState;
}
Upload this code, flip your physical switch, and watch your virtual landing gear drop! You can expand this code to include dozens of switches mapped to flaps, lights, brakes, and autopilot functions. Happy flying, Captain!