Project 27: IoT Weather Dashboard
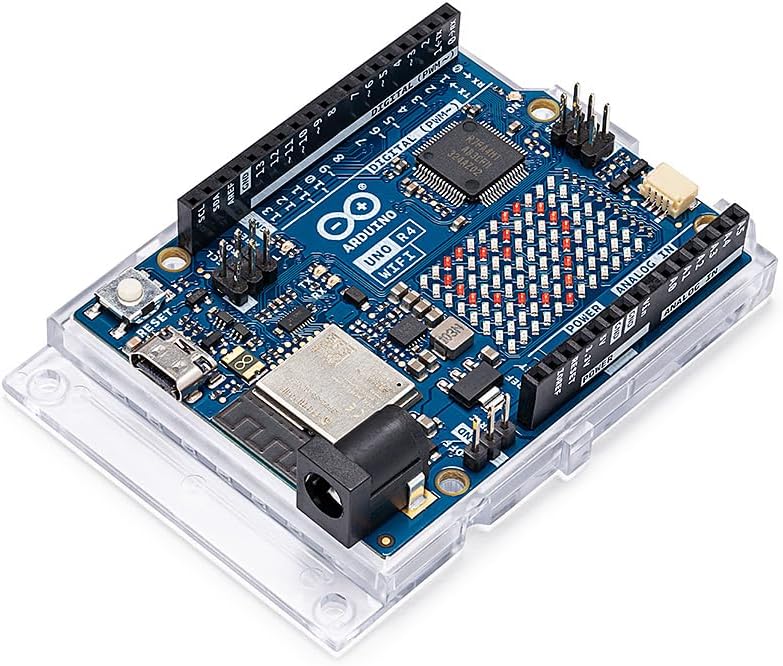
We’ve built offline weather stations before. But what if you want to know the forecast for tomorrow? For that, we need the internet. Adding Wi-Fi to a standard Uno used to require clunky shields, but with the Arduino UNO R4 WiFi, we have an ESP32 built right in. We are going to fetch live weather data from an API and display it on an OLED screen, completely eliminating the need to just look out a window.
What You Will Learn
- How to connect the Arduino UNO R4 WiFi to your local network.
- How to make HTTP GET requests to a public API (OpenWeatherMap).
- How to parse JSON data using the
ArduinoJsonlibrary. - How to format and display that data on an SSD1306 OLED display.
Parts List
- Arduino UNO R4 WiFi: The star of the show. It has the Uno footprint but packs a 32-bit ARM Cortex-M4 and Wi-Fi/Bluetooth capabilities. Get it on Amazon.
- 0.96” OLED Display (I2C): We used these back in Lesson 139. They are crisp, high-contrast, and only require 4 wires.
- Breadboard & Jumper Wires
(Need a smaller board for a permanent enclosure? The Arduino Nano ESP32 is a great, compact alternative that runs the same code!)
Step 1: Get an API Key
To get weather data, we need to ask a weather service. We’ll use OpenWeatherMap, which offers a free tier perfect for hobbyists.
- Go to openweathermap.org and create a free account.
- Navigate to your profile and click on “My API keys”.
- Generate a new key and save it (it will look like a long string of random letters and numbers).
Step 2: The Wiring
Because the UNO R4 WiFi uses the standard Uno pinout, wiring the I2C OLED is exactly the same as it was on the older R3:
- OLED VCC -> Arduino 5V
- OLED GND -> Arduino GND
- OLED SCL -> Arduino A5 (or dedicated SCL pin)
- OLED SDA -> Arduino A4 (or dedicated SDA pin)
Step 3: Required Libraries
Open the Arduino IDE. Go to Tools > Manage Libraries and install the following:
- ArduinoJson by Benoit Blanchon (Required for parsing the API response).
- Adafruit SSD1306 (For the display).
- Adafruit GFX Library (Required by the SSD1306 library).
Note: You also need the UNO R4 board definitions installed via the Boards Manager.
Step 4: The Code
Below is the framework for fetching the data. You will need to replace YOUR_SSID, YOUR_PASSWORD, YOUR_API_KEY, and YOUR_CITY with your actual details.
#include <WiFiS3.h>
#include <ArduinoJson.h>
#include <Wire.h>
#include <Adafruit_GFX.h>
#include <Adafruit_SSD1306.h>

#define SCREEN_WIDTH 128
#define SCREEN_HEIGHT 64
Adafruit_SSD1306 display(SCREEN_WIDTH, SCREEN_HEIGHT, &Wire, -1);

const char* ssid = "YOUR_SSID";
const char* pass = "YOUR_PASSWORD";
const char* apiKey = "YOUR_API_KEY";
const char* city = "YOUR_CITY,US";

WiFiClient client;
const char* server = "api.openweathermap.org";

void setup() {
  Serial.begin(115200);

  if(!display.begin(SSD1306_SWITCHCAPVCC, 0x3C)) {
    Serial.println(F("SSD1306 allocation failed"));
    for(;;);
  }

  display.clearDisplay();
  display.setTextSize(1);
  display.setTextColor(SSD1306_WHITE);
  display.setCursor(0,0);
  display.println("Connecting to Wi-Fi...");
  display.display();

  WiFi.begin(ssid, pass);
  while (WiFi.status() != WL_CONNECTED) {
    delay(500);
    Serial.print(".");
  }

  display.println("Connected!");
  display.display();
  delay(1000);
}

void loop() {
  getWeatherData();
  // Wait 10 minutes before checking again to avoid API limits
  delay(600000);
}

void getWeatherData() {
  if (client.connect(server, 80)) {
    client.print("GET /data/2.5/weather?q=");
    client.print(city);
    client.print("&appid=");
    client.print(apiKey);
    client.println("&units=imperial HTTP/1.1");
    client.println("Host: api.openweathermap.org");
    client.println("Connection: close");
    client.println();

    // Skip HTTP headers
    char endOfHeaders[] = "\r\n\r\n";
    if (!client.find(endOfHeaders)) {
      Serial.println(F("Invalid response"));
      return;
    }

    // Parse JSON
    StaticJsonDocument<1024> doc;
    DeserializationError error = deserializeJson(doc, client);
    if (!error) {
      float temp = doc["main"]["temp"];
      int humidity = doc["main"]["humidity"];
      const char* description = doc["weather"][0]["main"];

      display.clearDisplay();
      display.setCursor(0,0);
      display.setTextSize(2);
      display.print((int)temp);
      display.println(" F");

      display.setTextSize(1);
      display.println(description);
      display.print("Humidity: ");
      display.print(humidity);
      display.println("%");
      display.display();
    }
  }
  client.stop();
}
How It Works
- Connection:
WiFi.begin()connects the UNO R4 to your router. - The Request: We use
client.print()to manually send an HTTP GET request to OpenWeatherMap, asking for data in Imperial units (units=imperial). - Parsing: The API replies with a large block of JSON text. The
ArduinoJsonlibrary scans this text, finds the specific data points we want (temperature, humidity, weather description), and saves them into variables. - Display: We wipe the OLED screen and print our newly formatted variables.
Upload the code, and you should see your local temperature appear on the screen within a few seconds!
Taking It Further
This is just the beginning of IoT. Now that you know how to fetch data, try:
- Adding a 5-day forecast.
- Fetching the current time from an NTP server.
- Connecting to a different API, like a stock price tracker or a subscriber count for a YouTube channel!