Project 16: DIY RFID Security Door Lock 🔒
Have you ever wanted to secure a cabinet or a hidden snack compartment with keyless entry? In this project, we’ll build a motorized locking system that only grants access when you tap a magic plastic card. This project perfectly bridges digital logic with physical action, taking our RFID knowledge and pairing it with a servo motor to forcefully reject unauthorized users.
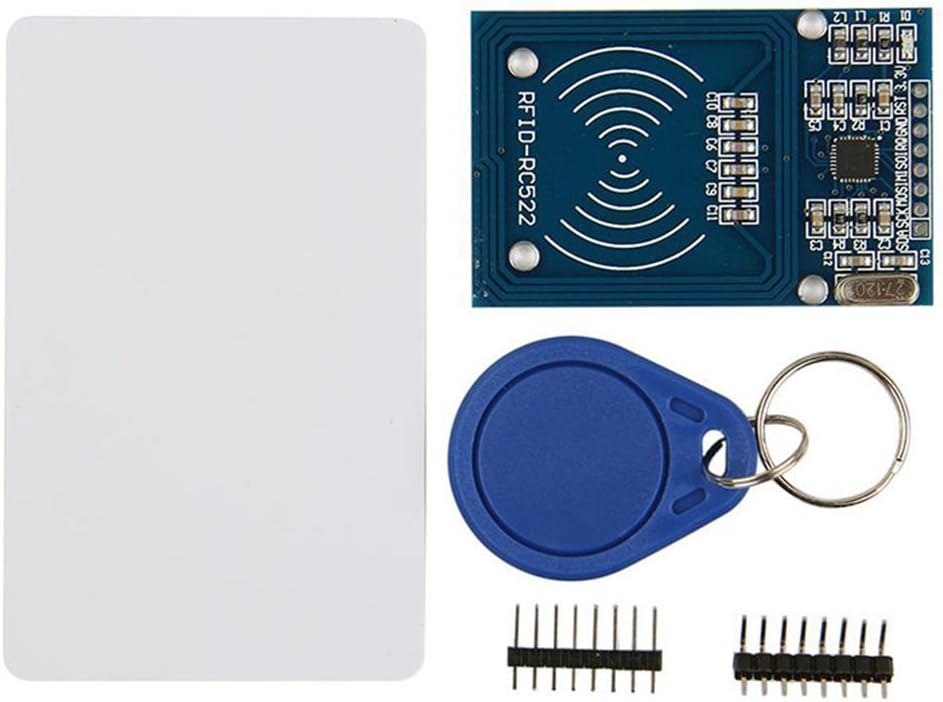 The RC522 RFID module is perfect for reading smart cards and key fobs to trigger a locking mechanism.
The Core Concept
The logic of an RFID lock is straightforward:
- The RFID Reader constantly scans for a nearby tag.
- When a tag is detected, the Arduino reads its Unique ID (UID).
- The Arduino compares the scanned UID against a saved list of “authorized” UIDs.
- If it matches, the Arduino commands the Servo Motor to turn (unlocking the latch), waits a few seconds, and turns back (relocking).
- If it doesn’t match, it denies access.
Parts Needed
To build this project, you’ll need the following components:
- ELEGOO UNO R3 Board – The brain of our security system.
- RC522 RFID Module Kit – Includes the reader, a white card, and a blue key fob.
- SG90 Micro Servo Motor – Acts as the physical lock actuator.
- Red and Green LEDs – Visual indicators for “Access Denied” and “Access Granted”.
- Breadboard & Jumper Wires
(Note: Using the links above helps support the Electron Parade project!)
Wiring the Circuit
Because the RC522 uses SPI communication, it requires specific pins on the Arduino Uno.
The RFID Reader (RC522)
- 3.3V: Arduino 3.3V (WARNING: 5V will fry the module!)
- RST: Pin 9
- GND: GND
- MISO: Pin 12
- MOSI: Pin 11
- SCK: Pin 13
- SDA (SS): Pin 10
The Servo Motor
- Red (Power): Arduino 5V
- Brown/Black (Ground): GND
- Orange/Yellow (Signal): Pin 6
Status LEDs
- Green LED: Pin 4 (with a 220Ω resistor to GND)
- Red LED: Pin 5 (with a 220Ω resistor to GND)
Finding Your Card’s UID
Before writing the final lock code, you need to know the Unique ID of the card or fob you want to authorize.
You can use the basic scanning code from Lesson 136 to read your card’s UID in the Serial Monitor. It will look something like this: DE AD BE EF. Write this down!
The Arduino Code
Make sure you have the MFRC522 library installed in the Arduino IDE. Replace the authorizedUID bytes in the code below with the ones you copied from your Serial Monitor.
#include <SPI.h>
#include <MFRC522.h>
#include <Servo.h>

#define SS_PIN 10
#define RST_PIN 9
#define GREEN_LED 4
#define RED_LED 5
#define SERVO_PIN 6

// Create an MFRC522 instance
MFRC522 rfid(SS_PIN, RST_PIN);

// Create a Servo instance
Servo lockServo;

// Define your authorized card's UID here
// (Change these numbers to match your card!)
byte authorizedUID[4] = {0xDE, 0xAD, 0xBE, 0xEF};

void setup() {
  Serial.begin(9600);
  SPI.begin();
  rfid.PCD_Init();

  pinMode(GREEN_LED, OUTPUT);
  pinMode(RED_LED, OUTPUT);

  lockServo.attach(SERVO_PIN);
  lockServo.write(0); // Start in the "Locked" position

  Serial.println("Security System Active. Swipe your card...");
}

void loop() {
  // Look for new cards
  if (!rfid.PICC_IsNewCardPresent() || !rfid.PICC_ReadCardSerial()) {
    return;
  }

  Serial.print("Card Scanned UID: ");
  for (byte i = 0; i < rfid.uid.size; i++) {
    Serial.print(rfid.uid.uidByte[i], HEX);
    Serial.print(" ");
  }
  Serial.println();

  // Check if scanned UID matches the authorized UID
  if (checkAuthorization()) {
    grantAccess();
  } else {
    denyAccess();
  }

  // Halt PICC
  rfid.PICC_HaltA();
}

bool checkAuthorization() {
  if (rfid.uid.size != 4) return false; // Basic check

  for (byte i = 0; i < 4; i++) {
    if (rfid.uid.uidByte[i] != authorizedUID[i]) {
      return false; // Mismatch found
    }
  }
  return true; // All bytes matched!
}

void grantAccess() {
  Serial.println("Access GRANTED. Unlocking...");

  digitalWrite(GREEN_LED, HIGH);
  digitalWrite(RED_LED, LOW);

  lockServo.write(90); // Turn servo to "Unlocked" position
  delay(5000);         // Keep unlocked for 5 seconds

  lockServo.write(0);  // Relock
  digitalWrite(GREEN_LED, LOW);

  Serial.println("Relocked.");
}

void denyAccess() {
  Serial.println("Access DENIED!");

  // Flash red LED
  for (int i = 0; i < 5; i++) {
    digitalWrite(RED_LED, HIGH);
    delay(100);
    digitalWrite(RED_LED, LOW);
    delay(100);
  }
}
How It Works
- Wait and Scan: The
loop()continuously runs, waiting for an RFID tag to enter the magnetic field of the RC522. - Byte Comparison: When a tag is swiped, the
checkAuthorization()function compares the incoming array of bytes against theauthorizedUIDarray. - Grant or Deny:
- If the tags match,
grantAccess()illuminates the green LED, rotates the servo to 90 degrees to pull the latch, waits 5 seconds, and then relocks. - If they don’t match,
denyAccess()flashes the red LED rapidly to signal a rejected attempt.
- If the tags match,
Mechanical Mounting
The electronic portion is only half the battle. To implement this in the real world, you’ll need to mount the servo motor to the inside of a door or drawer so that the servo “arm” (horn) acts as a deadbolt, sliding into a catch on the frame.
Because the RFID signal can pass through thin wood or plastic, you can mount the RC522 module on the inside of a cabinet door. From the outside, the door looks completely normal—there’s no visible lock! But when you wave your key fob over the secret spot, you’ll hear the servo whir and the door will unlock.