ElectronParade
Capstone Project: Laser Turret Tracker
In this capstone project, we are going to combine several fundamental skills: reading analog inputs, controlling multiple servo motors, and managing multiple components simultaneously to build a Laser Turret Tracker.
This project uses an analog joystick to move a laser diode mounted on a pan-tilt bracket. It’s a fun, highly visual project that provides an excellent introduction to 2-axis control systems—the same foundational logic used in security cameras, robotic arms, and CNC machines.
How It Works
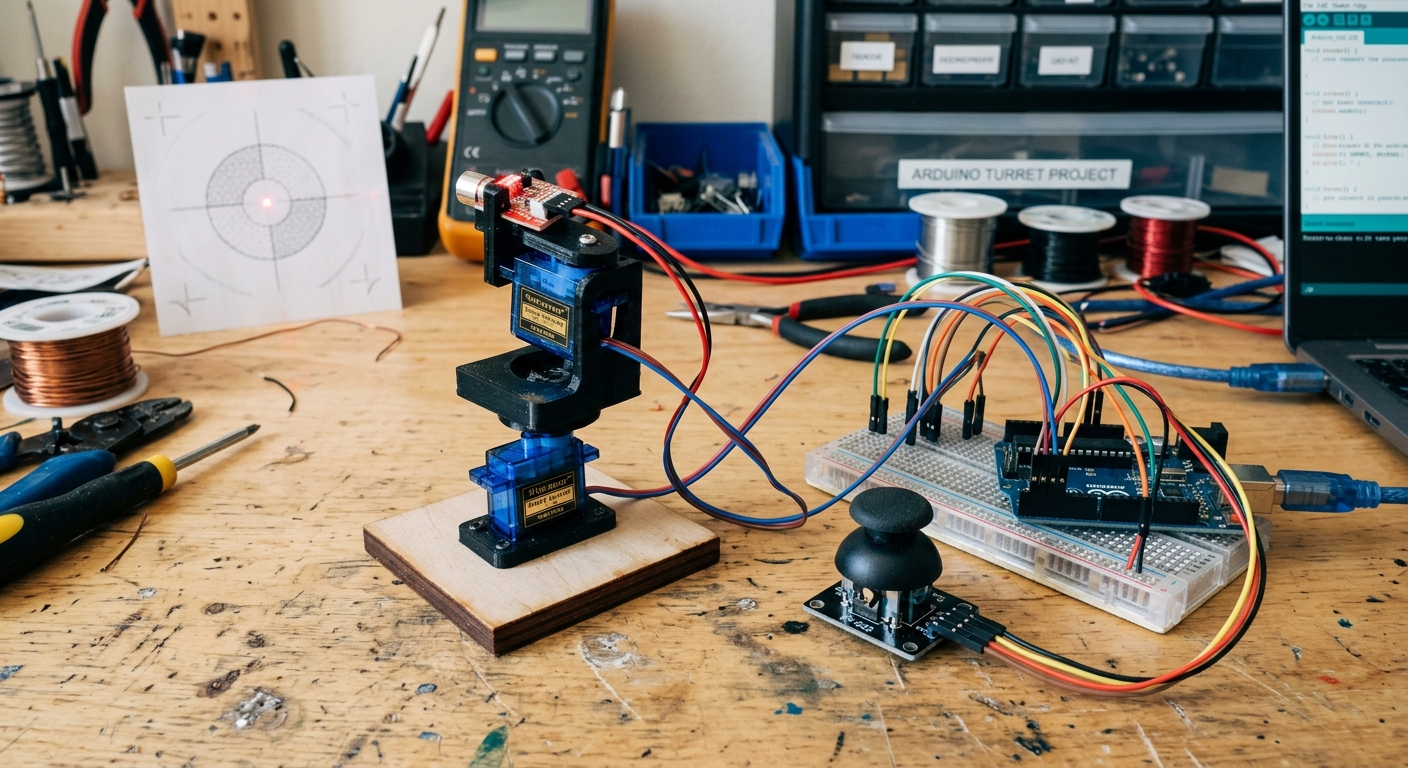
A pan-tilt bracket holds two micro servos. One servo controls the horizontal rotation (pan), and the other controls the vertical rotation (tilt). We use an analog joystick (which is essentially two potentiometers) to read the user’s input. The Arduino reads these analog values, maps them to the appropriate angles (0° to 180°), and instructs the servos to move. The laser diode simply stays on, pointing wherever the servos aim it!
Parts You Will Need
To build the laser turret, you’ll need the following components. If you don’t have them, you can pick them up here:
- Arduino UNO R3: The brain of the operation. (Check Price on Amazon)
- 2x SG90 Micro Servos: These will move our bracket. (Check Price on Amazon)
- Analog Joystick Module: For aiming the turret. (Check Price on Amazon)
- Servo Pan-Tilt Bracket: This holds the servos together to create the 2-axis movement. (Check Price on Amazon)
- 5V Laser Dot Diode Module: The “laser” part of the turret! (Check Price on Amazon)
- Breadboard & Jumper Wires
The Circuit Setup
Wiring this up looks complicated because of all the wires, but it’s very straightforward when broken down into sections:
1. Power Distribution
Servos require a good amount of current. While two micro servos can sometimes run off the Arduino’s 5V pin, it’s safer to use an external 5V power supply if they start jittering. For this guide, we’ll assume you are using the Arduino’s 5V, but be prepared to upgrade your power if needed.
- Connect the Arduino 5V pin to the red positive rail on your breadboard.
- Connect the Arduino GND pin to the blue/black negative rail on your breadboard.
2. The Joystick
The joystick module has 5 pins:
- VCC: Connect to the 5V rail.
- GND: Connect to the GND rail.
- VRx (Horizontal): Connect to Arduino Analog pin A0.
- VRy (Vertical): Connect to Arduino Analog pin A1.
- SW (Switch): (Optional) We won’t use the push-button feature in this code, but you could connect it to a digital pin to turn the laser on/off!
3. The Pan & Tilt Servos
Each SG90 servo has 3 wires (usually Brown, Red, and Orange):
- Brown (GND): Connect to the GND rail.
- Red (VCC): Connect to the 5V rail.
- Orange (Signal):
- Connect the Pan (bottom) servo to Arduino Digital pin 9.
- Connect the Tilt (top) servo to Arduino Digital pin 10.
4. The Laser Diode
The laser diode module has 3 pins (or 2 depending on the model). If it has 3 (S, V, G):
- G / -: Connect to GND.
- S / +: Connect to Arduino Digital pin 7.
The Code
Now, let’s write the code to tie it all together. We will use the built-in Servo.h library to handle the PWM signals for the servos.
#include <Servo.h>

// Create servo objects
Servo panServo;
Servo tiltServo;

// Define joystick pins
const int joyXPin = A0; // Pan control
const int joyYPin = A1; // Tilt control

// Define laser pin
const int laserPin = 7;

// Variables to store joystick readings
int joyXVal;
int joyYVal;

// Variables to store mapped servo angles
int panAngle;
int tiltAngle;

void setup() {
  // Attach servos to their control pins
  panServo.attach(9);
  tiltServo.attach(10);

  // Set the laser pin as an output
  pinMode(laserPin, OUTPUT);

  // Turn on the laser!
  digitalWrite(laserPin, HIGH);

  // Start servos in the middle position (90 degrees)
  panServo.write(90);
  tiltServo.write(90);
}

void loop() {
  // Read the analog values from the joystick (0 to 1023)
  joyXVal = analogRead(joyXPin);
  joyYVal = analogRead(joyYPin);

  // Map the joystick values to servo angles (0 to 180 degrees)
  // Note: You may need to swap 0 and 180 depending on the orientation of your servos
  panAngle = map(joyXVal, 0, 1023, 0, 180);
  tiltAngle = map(joyYVal, 0, 1023, 0, 180);

  // Write the angles to the servos
  panServo.write(panAngle);
  tiltServo.write(tiltAngle);

  // A short delay helps the servos reach their position smoothly
  delay(15);
}
Troubleshooting & Next Steps
- Jittery Movement: If the servos are shaking or resetting the Arduino, they are drawing too much current. Use a dedicated 5V power supply (like a breadboard power module) for the servos, ensuring you connect the external GND to the Arduino GND.
- Backwards Controls: If the turret moves left when you push right, simply swap the
0and180in themap()function for that axis. - Laser Control: Try adding code to use the Joystick’s push-button (SW pin) to turn the laser pin HIGH and LOW, adding a “firing” mechanism!
This project is a perfect stepping stone into more advanced robotics. Once you master the pan-tilt mechanism, you can swap the joystick for sensors (like ultrasonic or PIR) to make the turret track movement automatically!