ElectronParade
Project 4: Motion-Activated Alarm
Welcome back to the Workshop! Today we are moving into the world of home security—or at least, sibling deterrents.
We’re going to build a Motion-Activated Alarm using an Arduino and a PIR (Passive Infrared) sensor. When someone walks into the room, the alarm will sound!
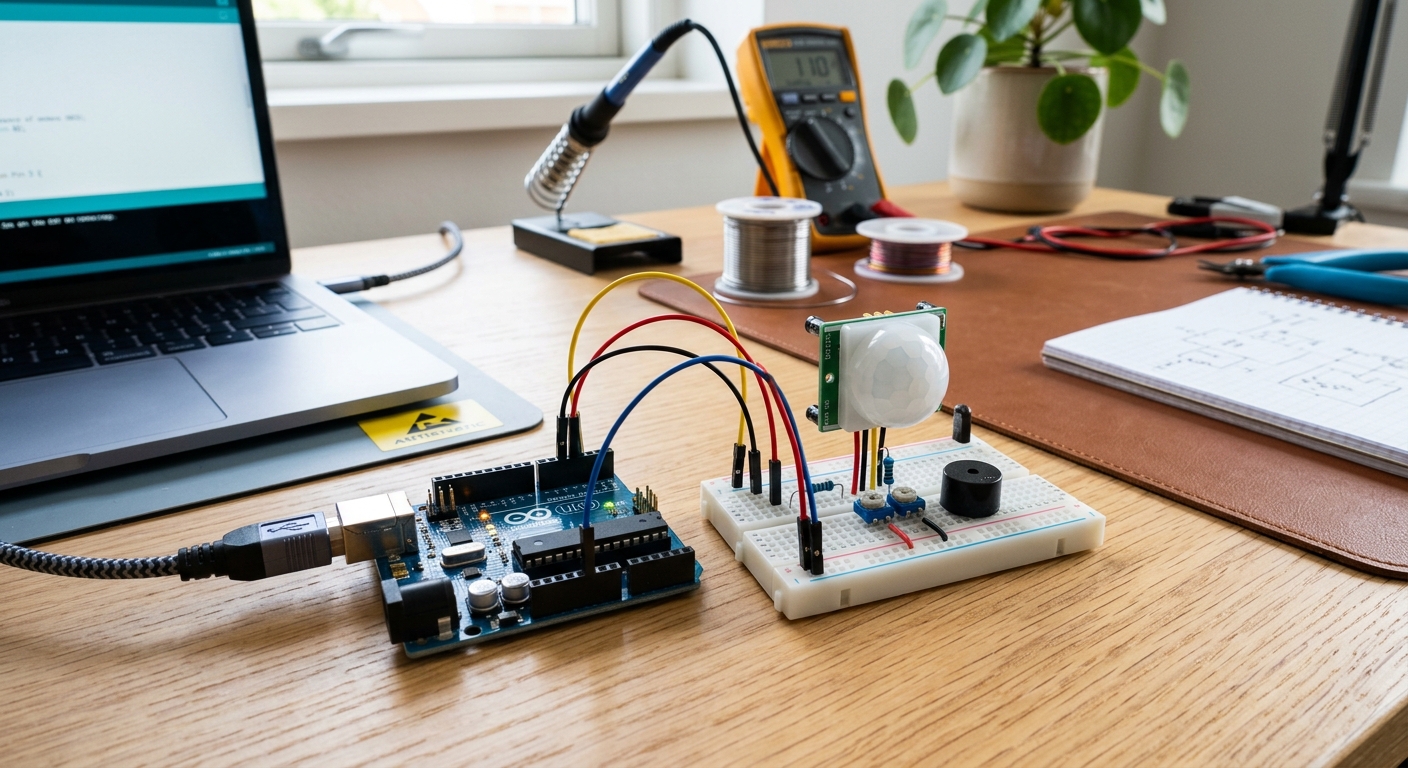 The HC-SR501 PIR sensor acts as the eyes of your new alarm system.
The Goal
To learn how to interface with a PIR motion sensor, understand digital inputs triggered by the environment, and use the tone() function to create an audible alarm.
The Parts List
- 1x Arduino Uno
- 1x Solderless Breadboard
- 1x HC-SR501 PIR Motion Sensor
- 1x Piezo Buzzer
- Jumper Wires
How does a PIR Sensor work?
PIR stands for Passive Infrared. Everything emits some low-level radiation, and the hotter something is (like a human body), the more radiation it emits. The PIR sensor doesn’t emit anything; it passively “listens” for changes in the infrared levels in its field of view. When a warm body walks by, it detects the change and sends a HIGH signal to the Arduino.
The Circuit
This is one of the simplest circuits to wire, but it yields impressive results!
- PIR Sensor: The HC-SR501 usually has three pins: VCC, OUT, and GND.
- Connect VCC to the 5V pin on the Arduino.
- Connect GND to the GND pin on the Arduino.
- Connect OUT to a Digital Pin (e.g., Pin 7).
- Piezo Buzzer:
- Connect the positive (longer) leg to a PWM-capable Digital Pin (e.g., Pin 9).
- Connect the negative (shorter) leg to GND.
The Code Snippet
The logic is simple: If the sensor reads HIGH, make a noise!
int pirSensor = 7;
int buzzer = 9;

void setup() {
  pinMode(pirSensor, INPUT);
  pinMode(buzzer, OUTPUT);
  Serial.begin(9600); // For debugging
}

void loop() {
  int motionDetected = digitalRead(pirSensor);

  if (motionDetected == HIGH) {
    Serial.println("INTRUDER ALERT!");
    // Play a high-pitched tone
    tone(buzzer, 1000);
    delay(500);
    // Play a lower-pitched tone for a siren effect
    tone(buzzer, 500);
    delay(500);
  } else {
    // Silence the buzzer when no motion is detected
    noTone(buzzer);
  }
}
(For a more in-depth guide on fine-tuning the sensitivity and delay dials on the back of your PIR sensor, check out this great tutorial from Maker.pro).