Have you ever spent three hours staring at your Arduino, wondering why your brand new NRF24L01 modules refuse to talk to each other? You check the wiring. You check the SPI pins. You download three different libraries. You rewrite the code. Nothing. Nada. Just an endless stream of radio.begin() returning false, or data that looks like it was chewed up by a garbage disposal.
Welcome to the club. Pull up a chair. Grab a beverage.
The NRF24L01 is an incredible little wireless transceiver. It’s cheap, it’s fast, and it can transmit data for miles (with the right antenna). But it has one fatal, soul-crushing flaw: It is an absolute diva when it comes to power.
The 3.3V pin on your standard Arduino Uno or Nano cannot provide the sudden bursts of current the NRF24L01 needs when it transmits. The voltage drops, the module browns out, and your data vanishes into the ether. Here is how to fix it once and for all.
The 10µF Capacitor Trick (The Quick Fix)
The most common and cheapest fix is to solder a capacitor directly across the VCC and GND pins of the NRF24L01 module.
When the module suddenly demands a spike of current to transmit a packet, the capacitor acts like a tiny battery, dumping its stored energy instantly to keep the voltage stable.
What you need:
- A 10µF to 100µF Electrolytic Capacitor. (If you don’t have one, grab an Electrolytic Capacitor Kit).
- A soldering iron.
How to do it:
- Identify the VCC (3.3V) and GND pins on the NRF24L01.
- Note the polarity of your capacitor! The side with the stripe (and the shorter leg) is Negative (-).
- Solder the positive leg to VCC, and the negative leg to GND. Keep the legs as short as possible!
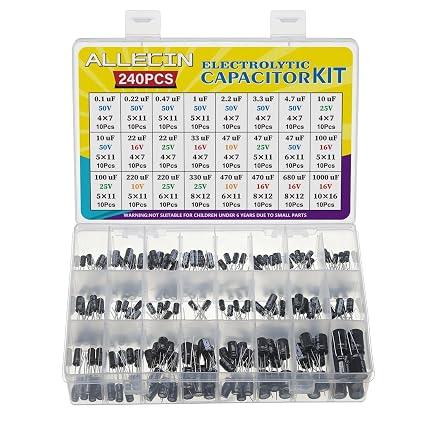 Always keep a kit of assorted electrolytic capacitors on your bench. They are the duct tape of electronics.
The Adapter Board (The Pro Fix)
If you are using the NRF24L01+PA+LNA (the long version with the big black antenna), the capacitor trick might not be enough. Those amplified modules pull way more current—sometimes up to 115mA. Your Arduino’s 3.3V regulator is going to tap out.
The best, most reliable solution is to use a dedicated baseboard adapter.
What you need:
Why it works: These little baseboards have a dedicated 3.3V voltage regulator (usually an AMS1117) and built-in bypass capacitors.
- You plug your NRF24L01 into the adapter.
- You feed the adapter 5V directly from your Arduino’s 5V pin (which can supply much more current).
- The adapter steps it down to a rock-solid, clean 3.3V.
Suddenly, your modules connect instantly, your range quadruples, and your hair stops falling out.
Still Not Working? The Checklist
If you’ve beefed up the power supply and it’s still acting dead, check these three things:
- Check your CE and CSN pins. The SPI pins (MOSI, MISO, SCK) are hardware-fixed (Pins 11, 12, 13 on an Uno), but CE and CSN can be any digital pins. Make sure your code matches your wiring.
- Move away from your router. NRF24L01 operates on 2.4GHz. Your home Wi-Fi router operates on 2.4GHz. If your Arduino is sitting next to your router, it’s getting drowned out. Change the channel in your code:
radio.setChannel(108);(moves it above standard Wi-Fi channels). - Double-check the data rate. Slower data rates have better range and penetration. Try dropping it from
RF24_2MBPStoRF24_250KBPS.
Stop trusting the Arduino 3.3V pin for radio modules. Give them the power they deserve, and they’ll reward you with rock-solid wireless communication.