ElectronParade
Welcome to the capstone project for Module 6! Over the past few lessons, we’ve explored the ESP32’s Wi-Fi capabilities, fetched data from web APIs, parsed JSON, and learned how to drive low-power E-Paper displays. Now, it’s time to put all those pieces together into something genuinely useful: a Wi-Fi connected E-Paper Desk Ticker.
This beautiful, low-power smart display will sit on your desk, wake up periodically, fetch live data (like weather, stock prices, or subscriber counts), update the screen, and go back to deep sleep. Let’s build it!
Project Parts List
To build this capstone project, you’ll need the following components:
- ESP32 Microcontroller: The brains of the operation, featuring built-in Wi-Fi and deep sleep capabilities.
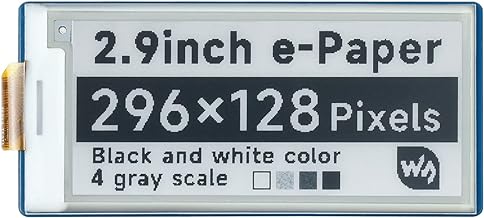
- E-Paper Display Module: An SPI-based E-Ink display (e.g., Waveshare 2.13” or 2.9” module).
- Breadboard: For prototyping and wiring.
- Jumper Wires: Male-to-male and male-to-female jumper wires for connections.
- Micro-USB or USB-C Cable: For programming and powering the ESP32.
- (Optional) LiPo Battery & TP4056 Charger: If you want to make the ticker completely wireless.
Wiring Overview
Connecting the E-Paper display to the ESP32 requires an SPI connection along with a few control pins. Here is the general wiring guide:
- VCC -> ESP32 3.3V
- GND -> ESP32 GND
- DIN (MOSI) -> ESP32 GPIO 23
- CLK (SCK) -> ESP32 GPIO 18
- CS (Chip Select) -> ESP32 GPIO 5
- DC (Data/Command) -> ESP32 GPIO 22
- RST (Reset) -> ESP32 GPIO 21
- BUSY -> ESP32 GPIO 4
Note: Pin numbers may vary slightly depending on your specific ESP32 development board. Always double-check your board’s pinout.
The Main Code
The code for this project is broken down into three main tasks: connecting to Wi-Fi, fetching the data, and updating the display. We’ll use the WiFi.h, HTTPClient.h, ArduinoJson.h, and GxEPD2 libraries.
Here is a simplified snippet showing the core logic:
#include <WiFi.h>
#include <HTTPClient.h>
#include <ArduinoJson.h>
#include <GxEPD2_BW.h>

// Display setup (adjust based on your specific E-Paper module)
GxEPD2_BW<GxEPD2_213_B74, GxEPD2_213_B74::HEIGHT> display(GxEPD2_213_B74(/*CS=*/ 5, /*DC=*/ 22, /*RST=*/ 21, /*BUSY=*/ 4));

const char* ssid = "YOUR_WIFI_SSID";
const char* password = "YOUR_WIFI_PASSWORD";
const char* api_url = "http://api.openweathermap.org/data/2.5/weather?q=London&appid=YOUR_API_KEY&units=metric";

void setup() {
  Serial.begin(115200);

  // 1. Connect to Wi-Fi
  WiFi.begin(ssid, password);
  while (WiFi.status() != WL_CONNECTED) {
    delay(500);
    Serial.print(".");
  }

  // 2. Fetch Data
  HTTPClient http;
  http.begin(api_url);
  int httpCode = http.GET();

  String temperature = "N/A";
  if (httpCode > 0) {
    String payload = http.getString();
    JsonDocument doc;
    deserializeJson(doc, payload);
    float temp = doc["main"]["temp"];
    temperature = String(temp) + " C";
  }
  http.end();

  // 3. Update Display
  display.init(115200);
  display.setRotation(1);
  // display.setFont(&FreeMonoBold9pt7b); // Assuming font is included
  display.setTextColor(GxEPD_BLACK);

  display.setFullWindow();
  display.firstPage();
  do {
    display.fillScreen(GxEPD_WHITE);
    display.setCursor(10, 30);
    display.print("Weather Update:");
    display.setCursor(10, 60);
    display.print("Temp: " + temperature);
  } while (display.nextPage());

  // 4. Go to Deep Sleep for 30 minutes
  esp_sleep_enable_timer_wakeup(30 * 60 * 1000000ULL);
  esp_deep_sleep_start();
}

void loop() {
  // Empty, as we enter deep sleep at the end of setup()
}
Wrapping Up
By completing this capstone project, you’ve mastered the essentials of building IoT devices with the ESP32. You now have a device that:
- Connects to the internet autonomously.
- Retrieves and processes structured JSON data from web APIs.
- Displays information on a beautiful, high-contrast, low-power screen.
- Conserves battery life by utilizing deep sleep modes.
Experiment with different APIs to display your calendar events, the number of unread emails, or your favorite cryptocurrency prices. The possibilities are endless!