ElectronParade
Lesson 149: Atmospheric Awareness - Using the BME280 Environmental Sensor
In earlier lessons, we used the DHT11 sensor to read basic temperature and humidity. While great for simple projects, the DHT11 is notoriously slow and lacks precision. If you are building a serious weather station or a drone that needs to calculate its altitude, you need something better.
Enter the BME280 Environmental Sensor.
This tiny powerhouse, originally designed by Bosch, measures temperature, humidity, and barometric pressure with incredible accuracy.
The BME280 is an I2C sensor, meaning it requires minimal wiring while delivering massive amounts of data.
Why Barometric Pressure Matters
Barometric (atmospheric) pressure is the weight of the air pressing down on the Earth. Why do we care about it?
- Weather Forecasting: A rapid drop in barometric pressure usually indicates a storm is approaching, while high pressure brings clear skies.
- Altimetry: Because the air gets thinner the higher you go, pressure drops predictably as elevation increases. The BME280 is so sensitive it can detect the change in altitude if you move it from the floor to your desk!
Need the parts? Grab a BME280 Sensor Module on Amazon. Make sure to get the I2C version (usually 4 pins) to keep wiring simple!
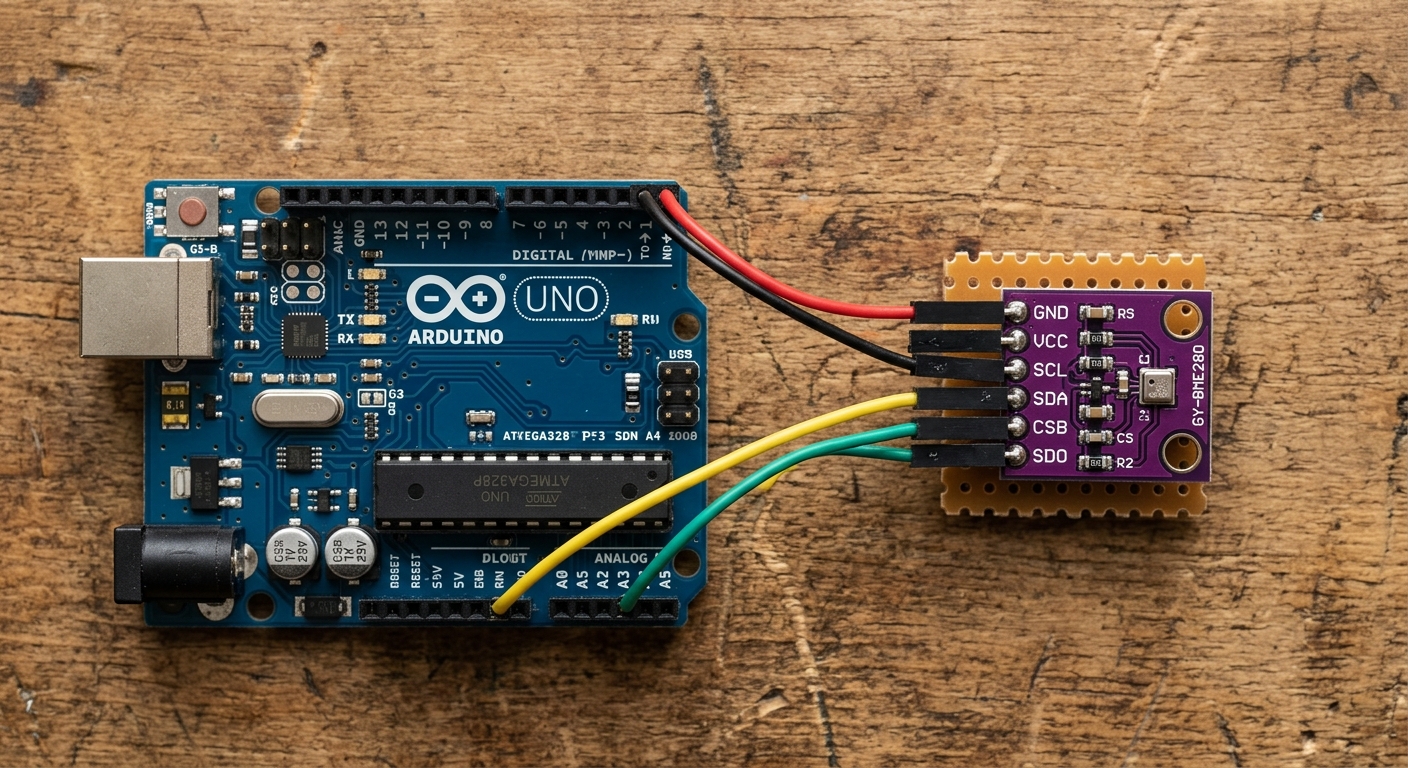
Wiring the BME280
The BME280 uses the I2C communication protocol, just like the OLED display we used in Lesson 139.
- Connect VIN (or VCC) to Arduino 5V (or 3.3V, check your specific module’s requirements).
- Connect GND to Arduino GND.
- Connect SCL (Clock) to Arduino A5.
- Connect SDA (Data) to Arduino A4.
The Code
To communicate with the sensor, we will use the Adafruit_BME280 library.
Go to Sketch > Include Library > Manage Libraries..., search for Adafruit BME280, and install it (and any dependencies it asks for).
#include <Wire.h>
#include <Adafruit_Sensor.h>
#include <Adafruit_BME280.h>

// Create the BME280 object
Adafruit_BME280 bme;

void setup() {
  Serial.begin(9600);

  // Initialize the sensor at the default I2C address (0x76 or 0x77)
  if (!bme.begin(0x76)) {
    Serial.println("Could not find a valid BME280 sensor, check wiring!");
    while (1); // Halt execution
  }
}

void loop() {
  Serial.print("Temperature: ");
  Serial.print(bme.readTemperature());
  Serial.println(" *C");

  Serial.print("Humidity: ");
  Serial.print(bme.readHumidity());
  Serial.println(" %");

  Serial.print("Pressure: ");
  Serial.print(bme.readPressure() / 100.0F);
  Serial.println(" hPa");

  // Approximate altitude assuming standard sea level pressure of 1013.25 hPa
  Serial.print("Approx. Altitude: ");
  Serial.print(bme.readAltitude(1013.25));
  Serial.println(" m");

  Serial.println("-------------------");
  delay(2000); // Wait 2 seconds between readings
}
Upload the code and open the Serial Monitor. You will see a continuous stream of highly accurate environmental data. Try blowing lightly on the sensor and watch the humidity spike, or lift the Arduino over your head and watch the altitude value shift!
Next time, try combining this sensor with the SD Card module from Lesson 146 to log environmental changes over an entire week!