ElectronParade
Lesson 148: Liquid Logic - Using a Water Level Sensor
Whether you are building a smart self-watering planter, a basement flood alarm, or an automated aquarium filler, you eventually need a way to tell your Arduino how much water is present.
In this lesson, we are going to use a simple, low-cost Analog Water Level Sensor. It will tell us not just if there is water, but exactly how deep the sensor is submerged.
The water level sensor measures the depth of the liquid by passing a small current across its parallel traces.
How the Sensor Works
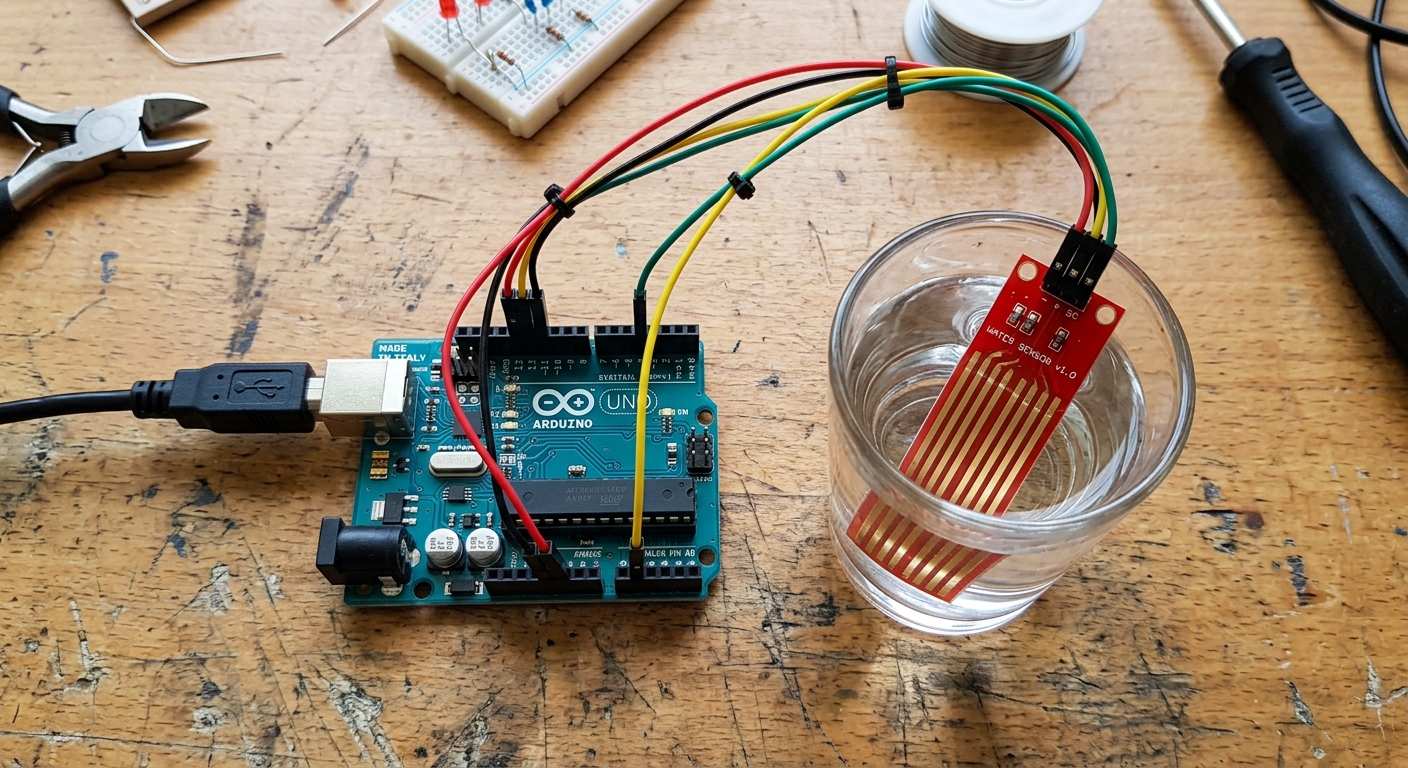
The sensor looks like a small red circuit board with several parallel, exposed metal traces running down its length.
It works on a very similar principle to the Soil Moisture sensor we used in Lesson 133. Water is a conductor. As you dip the sensor further into a glass of water, more of those parallel traces come into contact with the liquid, creating a larger conductive path. This effectively lowers the electrical resistance across the traces.
By applying 5V to the sensor, we can read the varying voltage returning from it on one of the Arduino’s Analog pins. The deeper the water, the higher the analog value!
Need the parts? Pick up a few Water Level Sensors on Amazon. They are inexpensive and perfect for simple liquid detection projects.
Wiring the Water Level Sensor
These modules are wonderfully simple. They have only three pins: Power, Ground, and Signal. Because we are measuring a variable voltage, the Signal pin must go to an Analog pin.
- Connect + (or VCC) to Arduino 5V.
- Connect - (or GND) to Arduino GND.
- Connect S (Signal) to Arduino A0.
The Code
Since this is an analog sensor, the code is identical to how we read a potentiometer or a light sensor (LDR). We will use the analogRead() function, which gives us a value between 0 (completely dry) and 1023 (fully submerged).
// Define the analog pin connected to the sensor
int waterPin = A0;

void setup() {
  // Initialize serial communication
  Serial.begin(9600);
}

void loop() {
  // Read the raw analog value from the sensor
  int waterLevel = analogRead(waterPin);

  // Print the raw value to the Serial Monitor
  Serial.print("Raw Water Level: ");
  Serial.print(waterLevel);

  // Create a simple text-based warning system
  if (waterLevel == 0) {
    Serial.println(" - Sensor is completely dry.");
  }
  else if (waterLevel > 0 && waterLevel < 300) {
    Serial.println(" - Water detected (Low Level).");
  }
  else if (waterLevel >= 300 && waterLevel < 600) {
    Serial.println(" - Water is halfway up the sensor (Medium Level).");
  }
  else if (waterLevel >= 600) {
    Serial.println(" - WARNING: High Water Level! Overflow imminent.");
  }

  // Wait half a second before reading again
  delay(500);
}
Upload the code and slowly dip the sensor into a glass of water (make sure not to submerge the top part with the electronic components!). You will see the values climb as the water creeps higher up the traces.
A Quick Warning on Corrosion:
Just like the soil moisture sensors, leaving a water level sensor powered on in water 24/7 will cause the metal traces to rapidly corrode due to electrolysis. For long-term projects, you should power the sensor’s + pin using a Digital pin, turning it HIGH only for the brief millisecond it takes to run analogRead(), and keeping it LOW the rest of the time!