ElectronParade
Lesson 145: Finding Yourself - Location Tracking with NEO-6M GPS
Have you ever wondered how your phone always knows exactly where you are? Or how drones navigate flawlessly back to their launch pad? The answer is flying roughly 12,000 miles above your head right now: the Global Positioning System (GPS).
In this lesson, we are going to tap into this incredible satellite network using our Arduino and a popular receiver called the NEO-6M. By the end, your Arduino will know its precise latitude, longitude, altitude, and the exact atomic time.
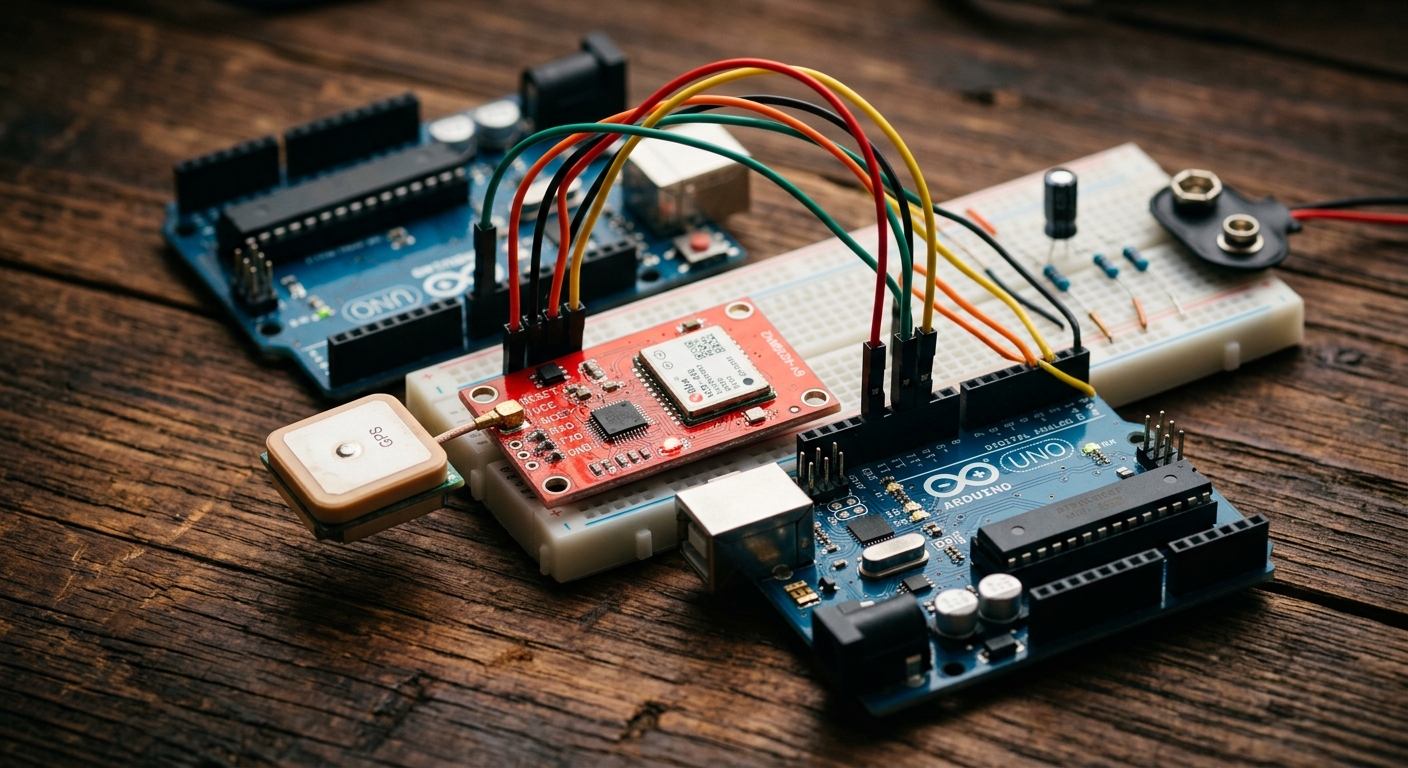
The NEO-6M GPS module, complete with a ceramic antenna to pick up faint satellite signals.
How GPS Works (The Short Version)
The GPS network consists of dozens of satellites constantly broadcasting their location and the exact time. Your GPS receiver (the NEO-6M) listens for these faint signals. By comparing the exact time the signal was sent to the time it was received, the module can calculate how far away each satellite is. If it can “see” at least four satellites simultaneously, it can use trilateration to pinpoint your exact 3D position on Earth!
The Hardware: NEO-6M Module
The NEO-6M is incredibly easy to use with an Arduino. It communicates via standard Serial (UART), which means we only need two data wires: Transmit (TX) and Receive (RX).
Need the parts? You can grab a NEO-6M GPS Module on Amazon. They typically come with the module itself and a small square ceramic antenna.
Wiring the GPS
The NEO-6M usually has 4 pins. Because we want to leave the Arduino’s hardware serial port (Pins 0 and 1) free for the Serial Monitor, we will use the SoftwareSerial library to create a virtual serial port on pins 4 and 3.
- Connect the NEO-6M’s VCC to the Arduino’s 5V pin (or 3.3V, depending on your module’s specific board markings, but most breakout boards accept 5V).
- Connect the NEO-6M’s GND to the Arduino’s GND.
- Connect the NEO-6M’s TX (Transmit) to Arduino Pin 4 (This will be our Arduino’s RX).
- Connect the NEO-6M’s RX (Receive) to Arduino Pin 3 (This will be our Arduino’s TX).
The NMEA Sentences
If you were to simply read the raw text the NEO-6M spits out, it would look like a jumbled mess of text strings, called NMEA sentences:
$GPRMC,081836,A,3751.65,S,14507.36,E,000.0,360.0,130998,011.3,E*62
While we could write code to split all those commas apart and do the math ourselves, the Arduino community has already done the hard work for us.
Installing TinyGPS++
To easily parse the GPS data, we will use an incredible library called TinyGPS++.
- Open your Arduino IDE.
- Go to Sketch -> Include Library -> Manage Libraries…
- Search for TinyGPSPlus (by Mikal Hart) and click Install.
The Code
This code sets up our SoftwareSerial connection to talk to the GPS, feeds the raw NMEA data into TinyGPS++, and then prints out nicely formatted human-readable data.
#include <SoftwareSerial.h>
#include <TinyGPS++.h>

// Choose two Arduino pins to use for software serial
int RXPin = 4;
int TXPin = 3;
int GPSBaud = 9600; // Default baud rate for NEO-6M

// Create a TinyGPS++ object
TinyGPSPlus gps;

// Create a software serial port called "gpsSerial"
SoftwareSerial gpsSerial(RXPin, TXPin);

void setup() {
  // Start the Serial Monitor
  Serial.begin(9600);

  // Start the software serial port for the GPS
  gpsSerial.begin(GPSBaud);

  Serial.println("Waiting for GPS lock...");
}

void loop() {
  // While there is data coming in from the GPS
  while (gpsSerial.available() > 0) {
    // Feed it to the TinyGPS++ object
    gps.encode(gpsSerial.read());
  }

  // If we have a new, valid location reading, print it
  if (gps.location.isUpdated()) {
    Serial.print("Latitude: ");
    Serial.print(gps.location.lat(), 6); // Print with 6 decimal places
    Serial.print(" | Longitude: ");
    Serial.println(gps.location.lng(), 6);

    Serial.print("Satellites Connected: ");
    Serial.println(gps.satellites.value());
    Serial.println("-------------------------");
  }
}
A Note on “Getting a Lock”
When you first power on the NEO-6M, it doesn’t know where it is or what time it is (a “cold start”). It has to search the sky, find satellites, and download their data. This can take up to 5-10 minutes the first time you use it!
For best results, take your Arduino outside or put it right next to a window. When the module finally gets a location lock, a small red or blue LED on the module will typically begin to flash.
Next Steps
Now that you know your exact coordinates, the world is your oyster! In our next lesson, we will learn how to permanently save this kind of data to an SD card, allowing you to build a portable GPS data logger.