ElectronParade
Lesson 141: Remote Control - Using an IR Receiver and Remote
We’ve used buttons, keypads, and joysticks to control our Arduino projects, but what if you want to control something from the comfort of your couch? Whether it’s a motorized robot or a custom LED lamp, adding remote control capabilities is an incredibly fun upgrade.
In this lesson, we will teach your Arduino to read signals from a standard Infrared (IR) remote control.
 An IR receiver can decode the invisible pulses of light sent by a TV remote.
How Infrared Remotes Work
Infrared light is invisible to the human eye, but it acts just like visible light. When you press a button on a remote, a tiny LED on the front of the remote blinks incredibly fast. Instead of staying solid, it flashes out a specific pattern of pulses (a code) that corresponds to the button you pressed.
To read these pulses, we use an IR Receiver (usually an HX1838 or VS1838B). This little component has a black plastic lens that filters out ambient room light and specifically looks for pulses of infrared light. When it sees them, it sends the electrical pulses directly to your Arduino.
[Add wireless control to your projects easily: IR Receiver Remote Kit Arduino]
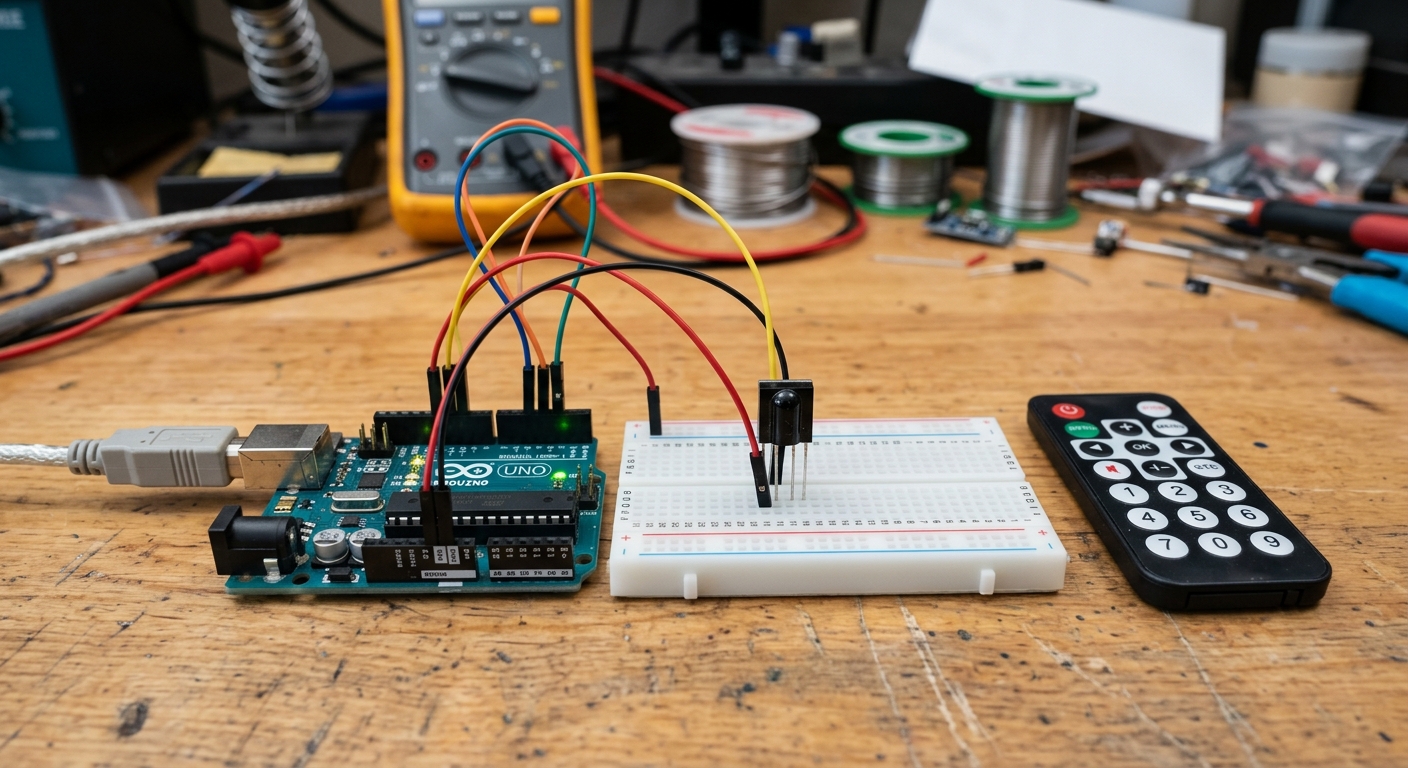
Wiring the IR Receiver
An IR receiver typically has three pins:
- Signal (OUT / S): Connects to an Arduino digital pin (e.g., Pin 11).
- Ground (GND / -): Connects to Arduino GND.
- Power (VCC / +): Connects to Arduino 5V.
Note: Always check the datasheet or markings on your specific module, as the order of the pins can vary!
The IRremote Library
Decoding the complex, high-speed pulses manually is extremely difficult. Fortunately, the open-source community has provided a robust library to do the heavy lifting.
- Open your Arduino IDE.
- Go to Sketch -> Include Library -> Manage Libraries…
- Search for IRremote (by shirriff, z3t0, ArminJo) and install it.
Reading Remote Codes
Let’s write a simple sketch to figure out the specific codes your remote uses. Every button has a unique hexadecimal code (like 0xFFA25D).
#include <IRremote.h>

int receiverPin = 11; // Pin connected to the IR receiver

void setup() {
  Serial.begin(9600);
  // Start the IR receiver
  IrReceiver.begin(receiverPin, ENABLE_LED_FEEDBACK);
  Serial.println("IR Receiver is active. Press a button on the remote!");
}

void loop() {
  // Check if we received an IR signal
  if (IrReceiver.decode()) {
    // Print the decoded raw data in HEX format
    Serial.print("Button Code: 0x");
    Serial.println(IrReceiver.decodedIRData.decodedRawData, HEX);

    // Resume listening for the next signal
    IrReceiver.resume();
  }
}
Upload the code and open the Serial Monitor. Point your remote at the receiver and press a button. You should see a hex code appear!
Now you can write if statements: If the code equals 0xFF629D, turn on the motor! In the next lesson, we’ll ditch the line-of-sight requirement of infrared and step up to radio waves using Bluetooth.