ElectronParade
Lesson 137: Keeping Time - Using a DS3231 Real-Time Clock (RTC)
If you’ve ever unplugged your Arduino, you know it forgets everything. When it boots back up, its internal timer starts right back at zero. But what if you want to build a digital clock, a daily plant waterer, or a data logger that records the exact time a sensor was triggered?
You need a Real-Time Clock (RTC).
In this lesson, we’ll use the highly accurate DS3231 RTC module to give our Arduino a permanent sense of time.
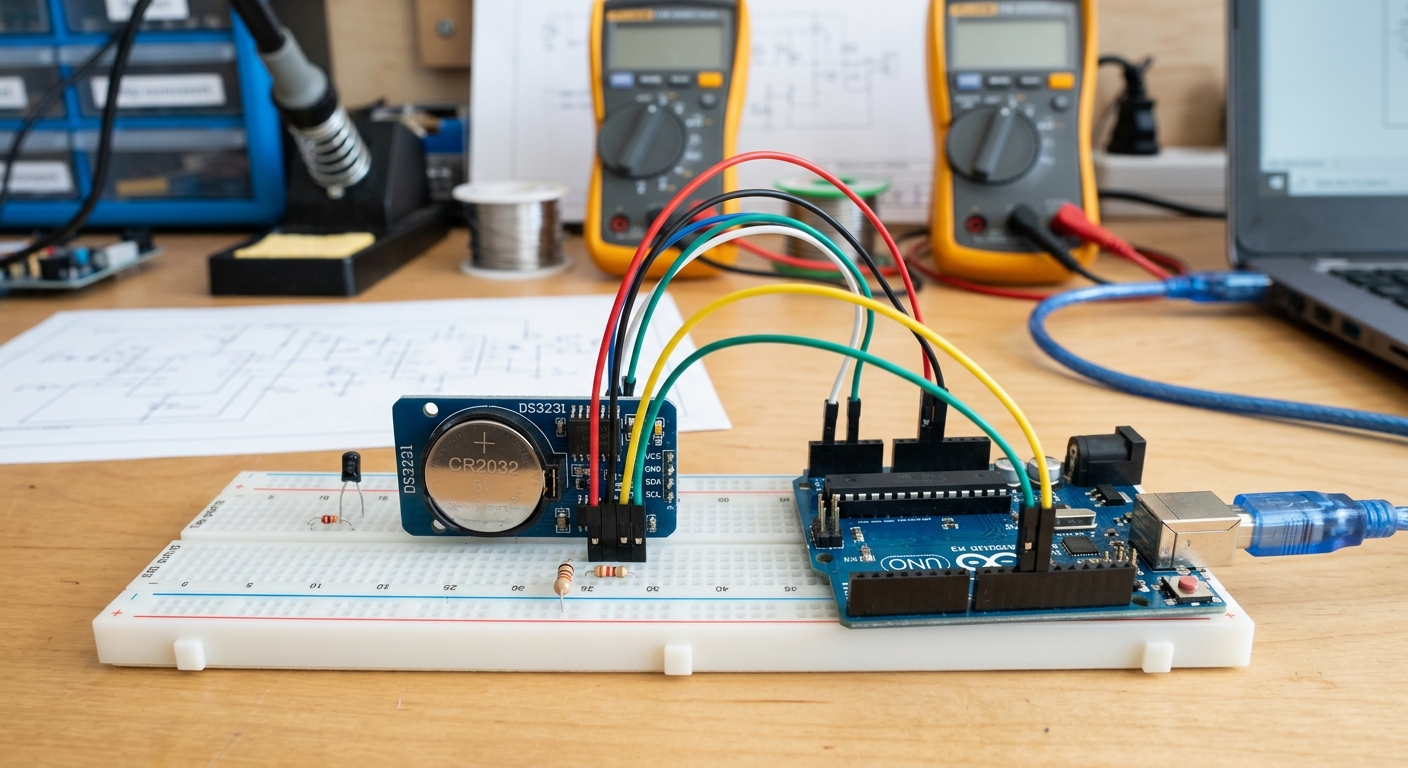 The DS3231 module keeps time independently of your Arduino, powered by its own coin cell battery.
The Magic of the Coin Cell
The DS3231 has a slot for a small CR2032 coin cell battery. This battery doesn’t power your Arduino; it simply keeps the tiny clock chip ticking inside the module. Even if your Arduino is sitting in a drawer unpowered for months, the DS3231 is quietly counting seconds, minutes, hours, and days.
Need the parts? Grab a DS3231 Real Time Clock module on Amazon. They usually come with the necessary battery included.
Wiring the DS3231
The DS3231 uses the I2C communication protocol, which means it only requires four wires to connect to the Arduino:
- VCC: Connect to 5V on the Arduino.
- GND: Connect to GND.
- SDA (Data): Connect to pin A4 on the Arduino Uno.
- SCL (Clock): Connect to pin A5 on the Arduino Uno.
Installing the RTClib Library
To make reading the time incredibly easy, we’ll use a library created by Adafruit.
- Open the Arduino IDE.
- Go to
Sketch > Include Library > Manage Libraries... - Search for RTClib (by Adafruit) and install it.
Writing the Code
This code will check the RTC and print the current date and time to the Serial Monitor.
#include <Wire.h>
#include "RTClib.h"

// Create an RTC instance
RTC_DS3231 rtc;

void setup() {
  Serial.begin(9600);

  if (!rtc.begin()) {
    Serial.println("Couldn't find RTC");
    while (1); // Halt if not found
  }

  // If the RTC lost power (battery was removed), set the time!
  if (rtc.lostPower()) {
    Serial.println("RTC lost power, setting the time...");
    // This line sets the RTC to the date & time this sketch was compiled:
    rtc.adjust(DateTime(F(__DATE__), F(__TIME__)));
  }
}

void loop() {
  // Get the current time from the RTC
  DateTime now = rtc.now();

  // Print the date
  Serial.print(now.year(), DEC);
  Serial.print('/');
  Serial.print(now.month(), DEC);
  Serial.print('/');
  Serial.print(now.day(), DEC);
  Serial.print(" ");

  // Print the time
  Serial.print(now.hour(), DEC);
  Serial.print(':');
  Serial.print(now.minute(), DEC);
  Serial.print(':');
  Serial.print(now.second(), DEC);
  Serial.println();

  delay(1000); // Wait 1 second
}
Upload the sketch and open the Serial Monitor. You should see the exact time printed every second! Try unplugging your Arduino from your computer, waiting a minute, and plugging it back in. The time will still be perfectly correct.
Next Steps
Now that your Arduino knows the time, the possibilities are endless. You can trigger relays at specific hours to automate your home, or log sensor data to an SD card with precise timestamps!