ElectronParade
Lesson 135: Taking Control - Using an Analog Joystick Module
If you’ve ever played a modern video game, you’re already very familiar with analog joysticks. They let you move characters or steer vehicles with precision—push a little to walk, push all the way to run.
In this lesson, we will bring that same level of control to our Arduino projects. By wiring up a standard Analog Joystick Module, you can steer motors, navigate menus on an LCD, or control a robotic arm.
 The standard KY-023 analog joystick module is essentially two potentiometers and a push-button packed into one device.
How Does It Work?
Underneath the plastic thumbstick, a joystick is made of three simple components:
- X-Axis Potentiometer: Measures horizontal movement (left and right).
- Y-Axis Potentiometer: Measures vertical movement (up and down).
- Z-Axis Switch: A tactile button that clicks when you press straight down on the stick.
Because the X and Y axes are just potentiometers, they act as variable resistors. When you connect them to the Arduino’s analog inputs, the Arduino reads a voltage level between 0 and 1023. When the joystick is sitting still in the center, both axes will read roughly 512.
Need the parts? You can find standard KY-023 Joystick Modules on Amazon. They are inexpensive and perfect for prototyping control interfaces.
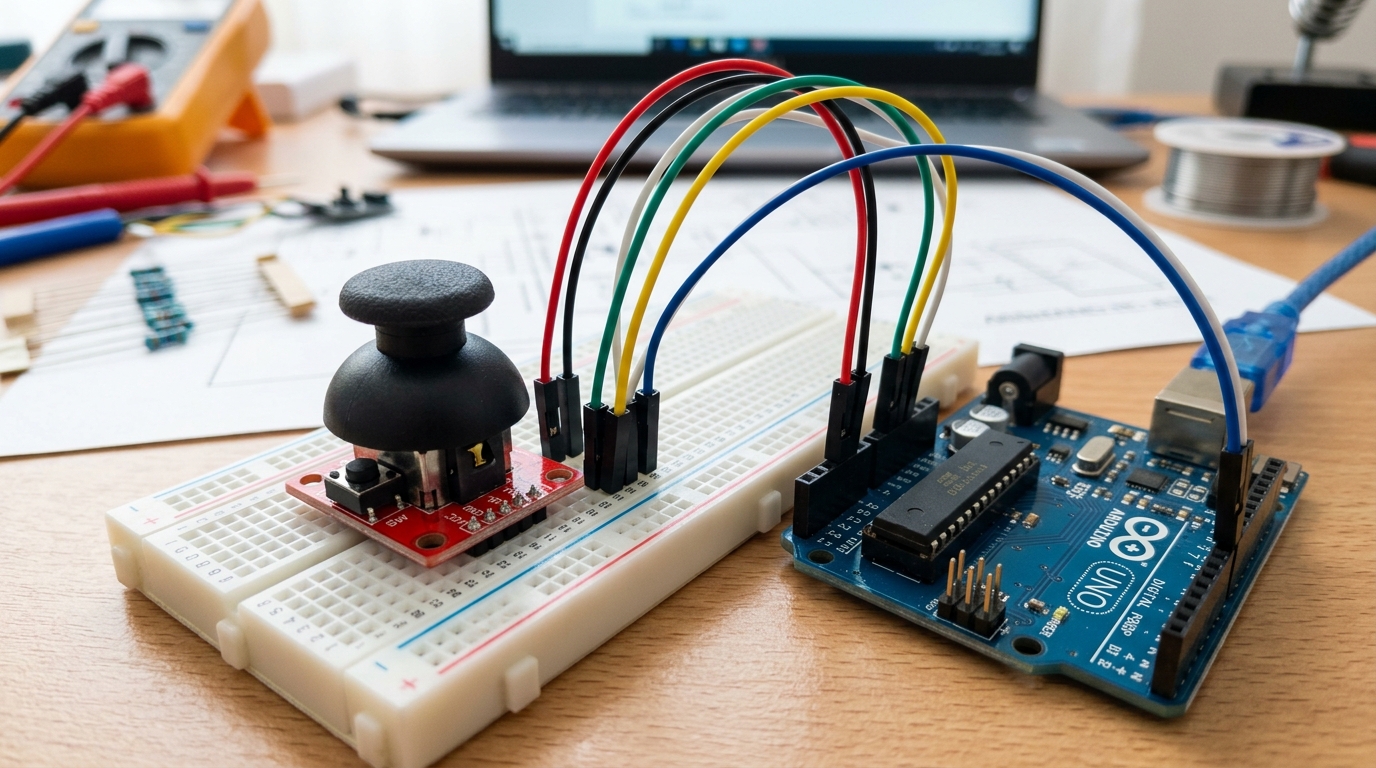
Wiring the Joystick
Most joystick modules have 5 pins. Here is how to connect them to your Arduino:
- VCC: Connect to 5V on the Arduino.
- GND: Connect to GND on the Arduino.
- VRx (or X): Connect to Analog Pin A0.
- VRy (or Y): Connect to Analog Pin A1.
- SW (Switch): Connect to Digital Pin 2.
Note: Some modules label the switch pin as ‘SEL’ or ‘BTN’.
Writing the Code
Let’s write a quick sketch to read the joystick’s position and print the values to the Serial Monitor.
// Define the pins connected to the joystick
const int xAxisPin = A0;
const int yAxisPin = A1;
const int buttonPin = 2;

void setup() {
  Serial.begin(9600);

  // Set the button pin as an input with an internal pull-up resistor
  // This means the pin will read HIGH normally, and LOW when pressed
  pinMode(buttonPin, INPUT_PULLUP);
}

void loop() {
  // Read the analog values (0 to 1023)
  int xPosition = analogRead(xAxisPin);
  int yPosition = analogRead(yAxisPin);

  // Read the button state
  int buttonState = digitalRead(buttonPin);

  // Print the results
  Serial.print("X: ");
  Serial.print(xPosition);
  Serial.print(" | Y: ");
  Serial.print(yPosition);
  Serial.print(" | Button: ");

  if (buttonState == LOW) {
    Serial.println("PRESSED");
  } else {
    Serial.println("Not pressed");
  }

  delay(100); // Small delay to make the serial monitor readable
}
Upload the code and open your Serial Monitor. Move the stick around! You should see the X and Y values shift smoothly from 0 to 1023 depending on the direction you push.
What’s Next?
Now that you can read joystick data, you can map those 0-1023 values to anything! In upcoming projects, we’ll use map() to translate these analog readings into angles for a servo motor.