ElectronParade
Lesson 134: Building a Clap-Switch - Using Sound Sensors & Microphones
Remember the classic “Clapper” commercials from the 90s? Clap on! Clap off!
In this lesson, we are going to build our very own version. By adding a simple microphone module to our Arduino, we can detect spikes in ambient noise and use them to trigger events, like turning on a light, triggering an alarm, or making a servo move.
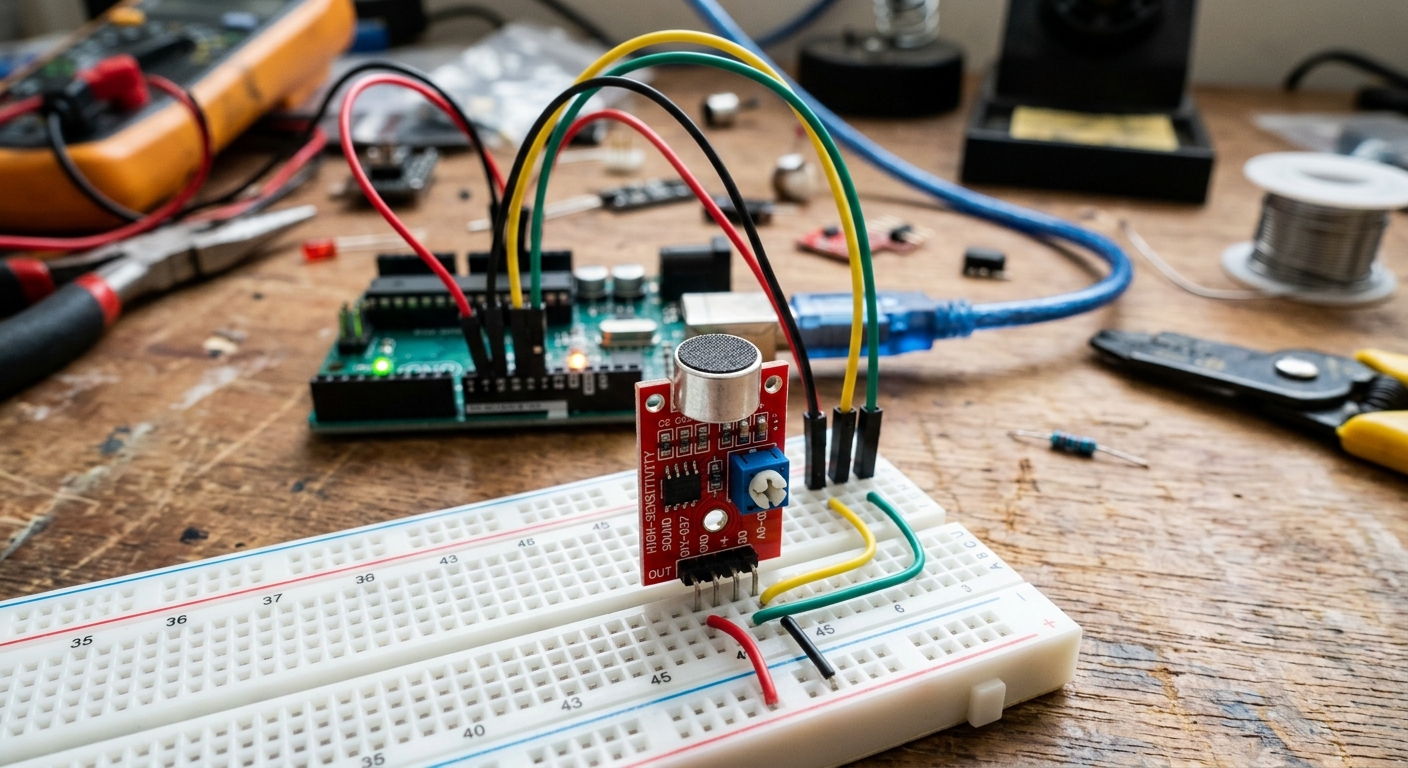 The KY-037 sound sensor module contains a tiny electret microphone and a built-in amplifier.
The KY-037 Sound Sensor
The most common microphone module for Arduino kits is the KY-037 (or its very similar cousin, the KY-038). It features a small silver cylinder (the microphone), an amplifier chip, and a blue potentiometer box.
Just like the soil moisture sensor from the last lesson, this module usually has four pins:
- AO (Analog Out): Outputs a real-time analog voltage representing the audio waveform.
- GND: Ground.
- VCC: Power (5V).
- DO (Digital Out): Outputs a simple
HIGHorLOWsignal. It staysLOWin a quiet room, but shootsHIGHif the noise exceeds a certain threshold.
While reading the raw audio waveform on the AO pin is possible, the Arduino isn’t fast enough to record high-quality audio. However, the DO pin is absolutely perfect for detecting loud, sudden noises like a hand clap!
Wiring the Circuit
Let’s wire up the sensor alongside an LED that we will toggle on and off.
- Connect the sensor’s VCC to the Arduino’s 5V.
- Connect the sensor’s GND to the Arduino’s GND.
- Connect the sensor’s DO pin to Arduino Digital Pin 2.
- Connect the long leg of an LED to Digital Pin 8, and the short leg through a 220-ohm resistor to GND.
Tuning the Sensor
Before we write code, we have to tune the sensor’s sensitivity.
Power on the Arduino. Look closely at the sensor module—there are usually two tiny surface-mount LEDs on it. One shows it has power. The other lights up when the DO pin goes HIGH.
- Grab a small screwdriver and turn the blue potentiometer.
- Turn it until the second LED just barely turns off in a quiet room.
- Clap your hands loudly next to the sensor. You should see that second LED flash briefly!
If it’s flashing when you clap, it’s perfectly tuned.
The Code
We are going to use a boolean variable to keep track of whether our light is currently ON or OFF. Every time the sensor hears a loud noise, we will flip that variable and update the LED.
int sensorPin = 2;   // The DO pin of the sound sensor
int ledPin = 8;      // Our output LED
boolean lightState = false; // Keep track of whether the light is on or off

void setup() {
  pinMode(sensorPin, INPUT);
  pinMode(ledPin, OUTPUT);
}

void loop() {
  int sensorValue = digitalRead(sensorPin);

  // If the sensor detects a loud noise (DO goes HIGH)
  if (sensorValue == HIGH) {

    // Flip the state of the light. If it was false, make it true.
    lightState = !lightState;

    // Update the actual LED to match our new state
    if (lightState == true) {
      digitalWrite(ledPin, HIGH);
    } else {
      digitalWrite(ledPin, LOW);
    }

    // Wait a little bit to prevent a single clap from triggering it 5 times instantly
    delay(250);
  }
}
Upload the code and give it a try! Clap your hands to turn the LED on, and clap again to turn it off. You’ve officially built a smart-home appliance from scratch!