ElectronParade
Lesson 123: Sensing Motion - Working with PIR Sensors
Ever wonder how automatic doors know you’re there, or how security lights turn on exactly when you walk by? They usually use a PIR (Passive Infrared) sensor. In this lesson, we’ll teach your Arduino to detect motion.
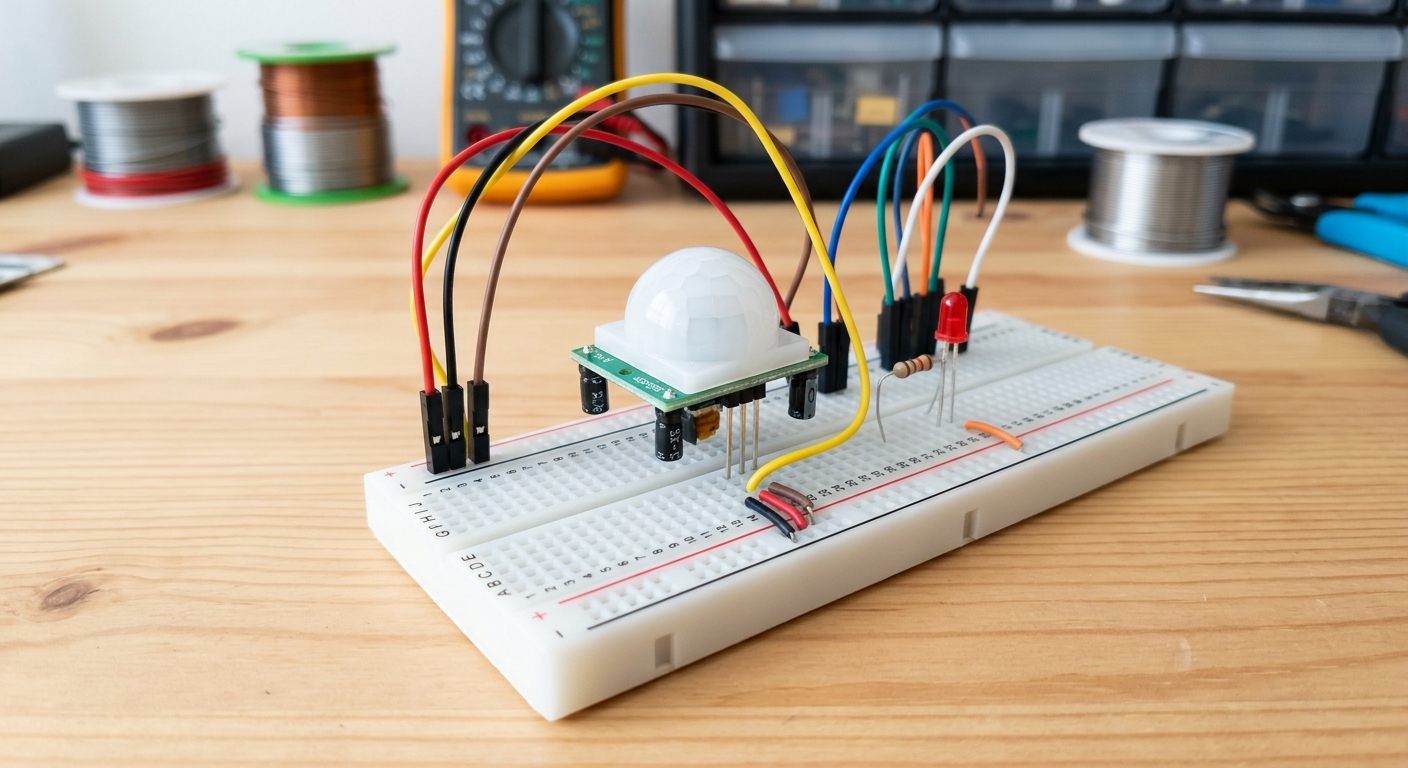 The white dome of the PIR sensor focuses infrared light from the environment onto the sensor inside.
What is a PIR Sensor?
PIR stands for Passive Infrared. Everything that has a temperature above absolute zero emits heat energy in the form of infrared radiation. Human bodies emit a lot of it.
The sensor is “passive” because it doesn’t send out any beams of energy (like a laser tripwire). Instead, it just sits there and listens for changes in infrared levels. When a warm body moves in front of the sensor, the sudden change in infrared radiation trips the alarm.
[Grab a pack of PIR motion sensors for your next home automation project right here: PIR motion sensors]
Wiring the PIR Sensor
Most hobbyist PIR sensors (like the common HC-SR501) have three pins: VCC, OUT, and GND. Sometimes they are hidden under the white dome, so you might need to pop it off to read the labels.
- VCC: Connect to 5V on the Arduino.
- GND: Connect to GND on the Arduino.
- OUT: Connect to Digital Pin 2 on the Arduino.
Writing the Code
The PIR sensor outputs a digital signal. When it detects motion, the OUT pin goes HIGH (5V). When the room is still, the OUT pin sits at LOW (0V). This means we can read it exactly like we read a simple pushbutton in Lesson 114!
int pirPin = 2;               // Choose the input pin (for PIR sensor)
int ledPin = 13;              // Choose the pin for the built-in LED
int pirState = LOW;           // We start, assuming no motion detected

void setup() {
  pinMode(ledPin, OUTPUT);    // Declare LED as output
  pinMode(pirPin, INPUT);     // Declare sensor as input
  Serial.begin(9600);
}

void loop() {
  pirState = digitalRead(pirPin);  // Read input value

  if (pirState == HIGH) {            // Check if the input is HIGH
    digitalWrite(ledPin, HIGH);      // Turn LED ON
    Serial.println("Motion detected!");
    delay(1000);                     // Wait a second so we don't spam the serial monitor
  } else {
    digitalWrite(ledPin, LOW);       // Turn LED OFF
  }
}
Tweaking the Sensor
On the back of the HC-SR501, you’ll usually find two orange potentiometers (dials). You can use a small screwdriver to adjust them:
- Sensitivity: Adjusts how far away the sensor can detect motion (usually up to 7 meters).
- Time Delay: Adjusts how long the
OUTpin staysHIGHafter motion stops. For Arduino projects, it’s best to turn this down to the minimum so your code can handle the timing.
What’s Next?
Now that your Arduino can see you coming, you can build an automatic room greeter, a burglar alarm, or a spooky Halloween prop. In the next lesson, we’ll give your Arduino a voice so it can actually sound the alarm!