ElectronParade
Lesson 122: Feeling the Heat - Measuring Temperature with the TMP36
Now that your Arduino can “see” light, let’s teach it to “feel” the heat. One of the simplest ways to measure temperature is using a low-voltage, precision analog temperature sensor like the TMP36.
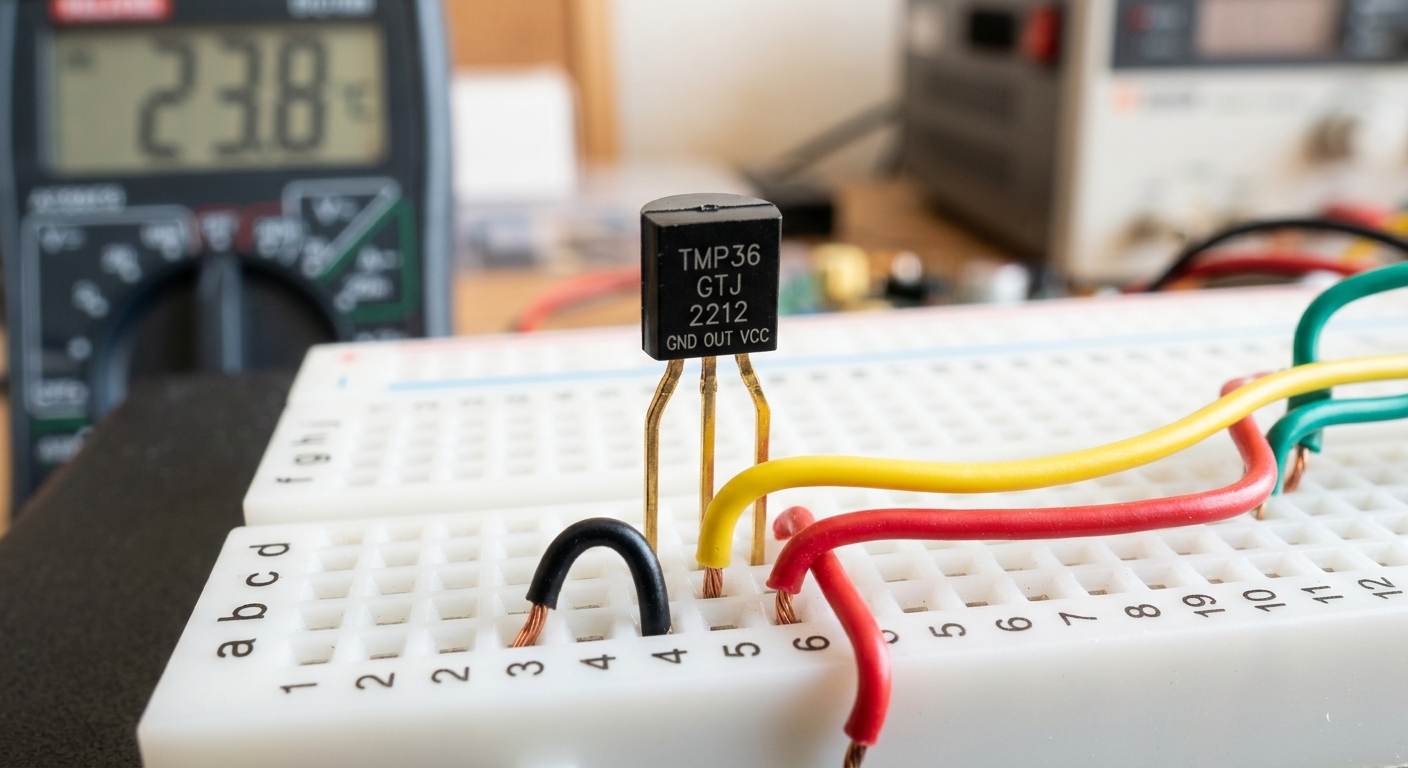 The TMP36 looks like a small transistor, but it packs a precise temperature sensor inside.
What is the TMP36?
The TMP36 is a solid-state temperature sensor. It outputs an analog voltage that is directly proportional to the ambient temperature. Unlike thermistors (which just change resistance), the TMP36 actually has a tiny integrated circuit inside that calibrates the output so that 10 millivolts (0.01V) equals exactly 1 degree Celsius.
Because it outputs an analog voltage, we can read it easily using an Arduino’s analog pins.
[Grab a pack of TMP36 sensors for your next weather station project right here: TMP36 sensors]
Wiring It Up
The TMP36 comes in a 3-pin TO-92 package. Warning: Wiring this sensor backward will cause it to heat up very rapidly and it will break! Pay close attention to the flat side.
- Hold the sensor so the flat side is facing you, with the pins pointing down.
- Left Pin: Connect to 5V power.
- Middle Pin: Connect to Analog Pin A1 on the Arduino.
- Right Pin: Connect to GND.
That’s it! No resistors required.
The Code & The Math
Because the sensor outputs a specific voltage, we have to do a little bit of math in our code to convert the Arduino’s 0-1023 analog reading into an actual temperature reading.
- First, convert the
analogReadnumber (0-1023) into Voltage. - Next, subtract the 0.5V offset (the TMP36 offsets its readings by 500mV so it can read negative temperatures).
- Finally, multiply by 100 to get degrees Celsius.
const int tempPin = A1;

void setup() {
  Serial.begin(9600);
}

void loop() {
  // 1. Read the analog value
  int reading = analogRead(tempPin);

  // 2. Convert the reading to voltage (for a 5V Arduino)
  float voltage = reading * 5.0 / 1024.0;

  // 3. Convert the voltage to temperature in Celsius
  // The TMP36 has a 500mV offset, and 10mV = 1 degree C.
  float temperatureC = (voltage - 0.5) * 100.0;

  // 4. Convert Celsius to Fahrenheit
  float temperatureF = (temperatureC * 9.0 / 5.0) + 32.0;

  // Print out the results
  Serial.print("Voltage: ");
  Serial.print(voltage);
  Serial.print(" V  |  Temp: ");
  Serial.print(temperatureC);
  Serial.print(" C  |  ");
  Serial.print(temperatureF);
  Serial.println(" F");

  delay(1000); // Read the temperature every 1 second
}
Testing Your Thermometer
Upload the code and open the Serial Monitor. You should see a steady stream of room temperature data.
Try lightly pinching the black plastic body of the TMP36 with your fingers. You should see the temperature rise to reflect your body heat! Let go, and watch it slowly cool back down to room temperature.
Up Next
Now that we have analog inputs working, what if we want to read digital sensors that communicate in complex data streams? Next time, we’ll look at the DHT11 digital humidity and temperature sensor.